| Home | |
| Adventures | |
| Specification | |
| Diary | |
| Photo Album | |
| Contact Us | |
| Feedback | |
| Hints & Tips | |
| Polish Words | |
| Web links | |
| Problem | |
| Polish Yachts | |
Fitting in Main Coachroof beams. Making Companionway hatch frame. October 1992.
3/10/92
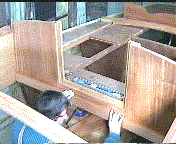
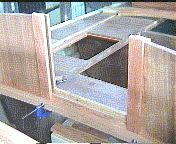
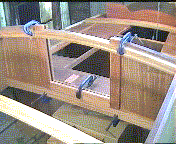
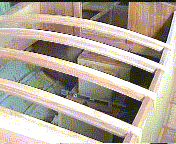
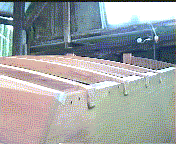
Very cold today - no sun - maximum temperature on boat was 12degrees. Fitted another two coachroof beams. Problem next is the companionway hatch area. This has to be completed before the main coachroof king plank can be fitted. We thought about the forward edge of hatch frame, maybe make it special i.e. curved as per the main cabin front. This would give extra inch coachroof height in the centre point.
 |
 |
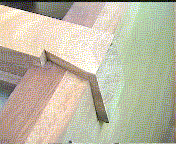 |
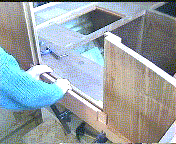
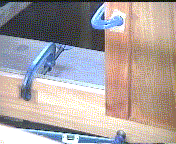
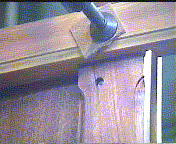
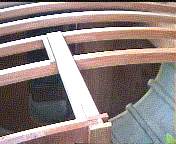
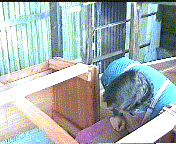
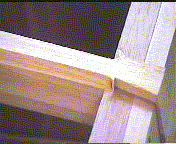
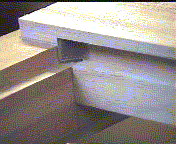
| Four main cabin coachroof beams in place | Closer view of coachroof beams in place | Close up of half dovetail joint. Note the coachroof beam is higher than the cabin side so the coachroof ply inserts, seat into the beams and go over the cabin sides. |
The lady rang from the propeller place to say the shaft is ready if we would like to pick it up, and measure it off. We told her the engine is our coffee table, and cannot be fitted just yet. And the shaft cannot be measured off until we have the propellor aswell. Will wait until the propellor is ready. Problems and answers depend on problems and answers of other problems and answers. Chain reaction - all of which must be done in correct sequence. Give me an anadin please !.
The Jig was cleaned down and prepared for the next laminated beam. Polythene double glazing was put up over all the windows at the top of the boat shed to add insulation. Newspaper scrunched up into every gap we could find.
4/10/92
Decided the 'Honduras' Mahogany plank (which cost us £10 last month) would be just sufficient to make the inner dropboard frame. Planed it up to be the same thickness as the inner fascia plank already planed up, on the top edge of which the inner dropboard frame will sit. Cut the inner dropboard frame to size, and cut out and routered two concealed half lap joints on the lower edges of the two sides to meet the bottom section. Clamped these into place, then routered out the first coachroof beam to fit round the inner dropboard frame. The coachroof beam still left in one piece to help keep the set-up straight.
|
|
|
|
|
Inner Fascia board being fitted into place |
Dropboard inner frame sides in place |
Dropboard inner frame base being fitted |
|
|
|
|
|
Concealed half lap joints used in dropboard frame sides and base |
A coachroof beam routered to fit around the dropboard frame sides |
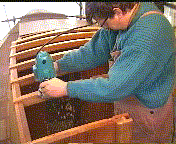
Close up of coachroof beam routered to meet dropboard frame side. Note the decorative routered edge on the coachroof beam. This was done on all coachroof beams. |
Dismantled the companionway step boxes, and using hardboard made up a pattern of the hull shape when the shaft (piece of string at this point) is at 10degrees. Take this and the mock engine bed pattern home to try and work out how on earth we can situate best the rear engine mounts. Knocked off about 19:30pm. Last night went for a beer and meal, and tonight made do with corned beef sandwiches and cider for eats. Spotted a brown rat in the lane.
6/10/92
A mock-up of the engine was made up from scraps of softwood. The gearbox was removed and also the bell-housing. Hardboard patterns were made of the front and rear of the bell-housing. The sump pattern was made up and flexible engine mountings screwed into place. Decided that it would be best if we could get the rear engine mounting brackets made up, that were bent upwards. The bilges area is very narrow especially aft of where the engine will sit.
Amidst Peppy sitting on the hardboard thinking it was a box made for him, the pattern ended up a mock up of the lower half of the engine. In place we can see what space there will be around the engine when it is installed.
9/10/92
Arrived 22:00pm, and whilst the usual routine of unloading tools/gear from the van and making up the bed was done, the mock-up engine was placed into position, and at 10 degrees angle, the situation was looking very promising. The aft original engine bed would need to be removed. The forward engine bed would have been ideal , cut out in one piece, and moved further aft, but as it was holding up the companionway box steps at the moment, it will need to remain for a while. 23:00pm dashed off for a Chinese.
10/10/92
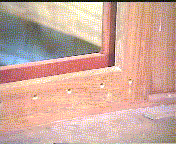
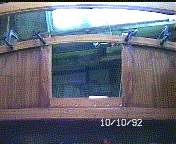
Both of us tired, and with the cold we did not wake up until 11:00am. The area of business today is dropboard frame. Before fixing dropboard frame sides needed to drill through the dropboard outer frame bottom edge i.e. some holes to allow any water that gets into the dropboard slots to escape onto deck. We was thinking about even putting copper pipe through the holes, but the copper would leave green stains on the wood therefore decided be better to paint some Epoxy into the holes to seal them. These holes were drilled out, all six/seven of them.
|
|
||
|
Holes drilled in base of outer dropboard frame to allow water to escape |
Contemplated routering the edges of the inner fascia beam upon which the inner dropboard frame sits. Good idea, gives the edge more class, than just being spoke-shaved. See photos below. Also then to do the inner edges of the main cabin coachroof beams. This was done and we were both pleased with the effect. The inner dropboard frame and the next hatch coachroof beam also routered. By evening , epoxied and screwed into place the inner fascia beam and the inner dropboard frame base which sits on the fascia beam. Twenty-one brass screws in the inner fascia beam, because the wood was slightly bent, and six stainless steel screws in the dropboard frame base. All holes will be plugged at a later stage. Because of the clamps in situation, the inner dropboard frame sides cannot be done until tomorrow.
11/10/92
We set to preparing and fixing in the inner dropboard frame sides and coachroof beam. Before beam fixed though it had to be routered on top forward edge ready for the 8mm ply inserts. The router will not fit in after the beam is fixed. The dropboard frame sides were prepared, with the screw holes etc. - offset from the screws of the outer dropboard frame sides. Problem whilst epoxying, was that Lance was inboard and Ruth needed to be inboard and on deck simultaneously. Fitting this fascia beam and the dropboard frame sides proved an obstacle for efficient co-operation. Epoxy was going off fast, drips everywhere, tissues of surplus Epoxy going all over. Race against time to clean the whole area at once. Oh for being an octopus, with all those arms, or is it legs. Whilst the router bit in the router, routered out the groove for the 8mm ply inserts either side of the forward hatch area.
|
|
|
|
|
Fascia and Dropboard frame fixed into position. Coachroof beam fitted to shape |
Dropboard Frame meeting Fascia board. Note decorative routering. Holes will be plugged at a later stage |
Routered either side of forward hatch frame, in readiness for coachroof ply inserts |
13/10/92
Tried to bend some steel for the engine mount brackets ourselves, it was no good - it was too thick. Tried to find a place that could bend the steel for us. After trying several workshops, found a place with a large enough press, and we left the brackets, to pick up at 9:00 tomorrow (Wed). They charged a nominal fee of £1. Then two short lengths of steel were cut and welded, onto the new brackets. Two holes were drilled to attach the bracket to the original holes. Once finished the brackets will need galvanising.
17/10/92
At approximately 10:00am we were sat having a cup of tea in the van, when a strange car pulled up along side us & two strange chaps got out, and proceeded to walk up our steps to the boat. Who do they think they are. We were aghast. Turned out they had arranged to meet the landowner, John and his son, Gary , but they had not yet arrived. They sat on the bench and waited, and within five minutes John and Gary arrived and pulled up behind our van. They were chatting and walked over to the centre of the field, Oh no, we both thought. What is scheming up?. Are they looking to sell the place ?, Are these chaps going to build something here ?. Are they putting in for planning permission ?. Are these chaps from the council or what ?. We both felt ill, and disappeared in to the boat to keep a low profile. We had been told nothing of this. For about an hour we both worried ourselves sick. We are going to have to chop up and burn the boat if they want us out now. No words could express our true feelings at this point - certainly this was the last thing we needed first thing on Saturday morning, with a temperature hovering about zero degrees!.
All was revealed, when an hour later the John and Gary came up to see us on the boat. John told us not to worry, they were putting in for planning permission, and these chaps were going to take some measurements etc. After they left, we were both depressed and felt knock out for ten. We could not concentrate on thinking about anything constructive. Now the situation was desperate. What we had just tolerated that morning was unforgettable.
Several cups of tea and honey later, now 12:00 noon, Ruth took off for some much needed gas for the fire, and Lance got the tractor mower out. The sun was out now - just the tonic we needed. However, having just cut the grass, near the workshops, and down to the shed at the bottom of the field - guess what ?. The belt on the mower jammed, and smoke bellowed out all over. Oh no!. And we could believe it looking at the events of today so far. The main belt had gone. No more grass cutting until we get a replacement. Dare we start on anything else today. Several more cups of tea later decided to fit the next but last main coachroof beam. Ruth started tidying under the boat but had to stop because of the dust being generated. Lance was on the boat sneezing like a buffalo. Having fitted this coachroof beam we got out all our boat books to try and establish exactly how we are going to make the companionway hatch area. Drew out many sketches, tried tearing our out hair many times, trying to visualize all sides of the hatch frame jointing area, and how best to make it up. Last night was cold, and tonight was forecast to be the same. We sat in the van for an hour or so with the fire on, and about 21:00pm decided to change and pop down to the local pub.
18/10/92
Forced ourselves out of the warm covers about 10:30am. Not as cold as yesterday, but cold enough. Still trying to work out this hatch area. Spent a good three hours, thinking, drawing more sketches, more cups of tea, several anadins and a good long nap, and now it was 17:00pm. Decided to make a start and cut away the middle section of the aft most main cabin coachroof beam. Need to make up some beams now, two of them about 40mm x 3" x 33" for the companionway hatch framework.
Week ending 23/10/92
Purchased taps (metric 10mm) to make two extra bolt holes, one in each side of the bell housing of the engine. Removed the gearbox and bell housing to do this. On fitting the new engine mount brackets now, the two existing bolt holes are used on each side, but longer bolts are needed, and the new extra bolt position on each side is an extra support.
We purchased a new belt for the tractor mower. Not sure if we actually needed the larger size, but we will have to see. The original had completely disintegrated, leaving us unsure of the exact length.
24/10/92
First thing we tried the belt on the tractor, and it was too small. The adjustment possible for the belt was already on the tightest position, and thus the belt could not be released in action. How disappointing. We do need the larger belt after all.
Started on the boat and cut and planed up the two companionway hatch frame side pieces. Bitter cold today. Lance had hot water bottle down his pants, and Ruth had the hand warmer in her pocket. Positioned the first (portside) companionway hatch frame side in place and measured, marked up and routered the frame side and coachroof beam where necessary. By now it is 19:00pm and it is really too cold to work now. You have to be outgoing to actually enjoy working out in the cold and camping in the van through winter, but maybe we are mad to even be doing it!. It would be so nice to sit in front of the fire watching television, drinking tea etc., but then you would be getting nowhere in life. Off to the local pub at 22:00pm for a pint and a thaw out.
|
|
|
|
|
Cutting to size the portside companionway hatch frame beam |
Scribing in the portside companionway hatch frame beam. Note the complex joints around the dropboard frames. |
Portside companionway hatch frame beam fitted in place. |
25/10/92
Measured, marked up and routered the starboard companionway hatch frame side. Clocks went back one hour last night, but we still woke up at 8:00 am, really it was now only 7:00 am.. Amidst damp, rain, cold and gale force wind, we were cracking on with the boat by 9:00am real time. How is that for dedication and enthusiasm. Even we surprise ourselves at times. Routered ( for the ply inserts) the upper edges of all the main cabin coachroof beams. Routered the remaining underside necessary edges of the coach roof beams. These are not yet fixed into place. Orbital sanded the companionway hatch frame beams. Managed to Epoxy in place the companionway hatch frame beams and clamp them into place.
Letter had arrived for us at home, from Power Propellers, to say the propeller and shaft were ready for collection and managed to exchange the tractor/mower belt for a larger one at no extra charge.
|
|
|
|
|
Fitting starboard companionway hatch frame beam |
Routering all Coachroof beams ready for ply inserts |
Coachroof beam showing routered groove so ply inserts seat into the beam, and go over the cabin side. The joints need final tidying up |
|
|
|
|
Both companionway hatch side beams are proud of the coachroof beams as it is intended to overlay the deck ply inserts a further sheet of 8mm plywood |
Finished companionway hatch portside beam. Note the double grooving in readiness for both layers of plywood |
Companionway hatch side beams both fixed in place. |
31/10/92
We arranged to pick up the propeller and shaft at 10:00am, so set the alarm clock in case, but we woke up at 7:30am feeling just a little cold, and thirsty. Put the fire on and made a cup of tea. The field was frosted over outside, very white. At 9:50am we took off to Power Propellers. We both must of looked like gob-smacked goldfish, when he explained that they had threaded and made up the coupling end of the shaft, so it would be easier to couple up to the engine, and then just mark up where the propeller is to be. We had been planning to do just the opposite. We trotted off down to the workshop anyway to find the shaft. Once we picked up the shaft, it dawned on us that we were having a double ended shaft therefore uncouple the coupling and put on the propeller. Phew !. The propeller was dug out from another workshop/cabin, and then we went back to the office to square up. We settled the bill, and mentioned we would like some spare (2) castle nuts and key pins. These we will pick up when we take the shaft back next for the other end machining. Back at the ranch, we took the coupling off the shaft, and put on the propeller. But the propeller went further onto the shaft than expected. Looking at things more closely, we found that the propeller boss was 60mm deep, and the flexible coupling boss was 69mm. With the propeller fitted, the castle nut only fitted the threads, which left a gap between the nut and propeller boss. The ends of the shaft will have to be re done, and alter the coupling. The propeller fits satisfactorily in the rudder aperture though. We wonder now if we could have got a 15" propeller.
Back on the boat the beams around the companionway hatch area were sanded down and finished off the routering out grooves ready for fitting in the coachroof ply inserts port and starboard of the companionway hatch area.
Fitted the belt on the tractor, having had to adjust the pulleys for a slightly larger belt. When we come to start it, the sun had by now dried the grass, guess what ?. The usual , the batteries were flat. We put it on charge, but four hours later it was now getting dark. By 19:00pm it was too cold to work outside, so we retired into the van with the fire on. Spent the next two hours , with headaches, trying to work out the situation with the shaft bearing. With the fibreglass tubing to sleeve the bearing in situation, the screw bolt holes on the bearing flange are too close to the fibreglass to have the metal plate inside for tapping. Best solution so far is , not to have any plates or bolts actually epoxied into the Hull because that would deny future access , but to have two bolts, just threaded at the end, and tap the holes on the bearing flange. As the bearing is screwed in, the bolts are just to prevent the flange turning. 22:00pm now and decided to get a Chinese tonight.
- - - - - - This is the end of Diary Section 9 - - - - - -
![]()


