| Home | |
| Adventures | |
| Specification | |
| Diary | |
| Photo Album | |
| Contact Us | |
| Feedback | |
| Hints & Tips | |
| Polish Words | |
| Web links | |
| Problem | |
| Polish Yachts | |
Completing fixing Main Cabin Coachroof beams and ply inserts. November 1992.
1/11/92
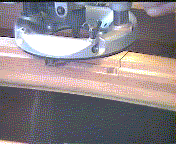
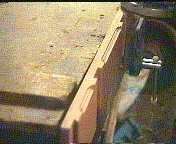
Set on to work on the boat. We broke a record, and within five minutes we had cut and planed up the main cabin coach roof king plank. Secret was we cheated. We used the ready cut and planed piece we had set aside for the aft covering board. Something different will need to be done with the aft covering board anyway because the wood will not bend to such a curvature. Tidied up the king plank, then routered out the main beams to take the king plank. The workshop was hoovered out. Yes housework is still important. How else would you find the screw that we dropped, if the floor was covered in sawdust. The king plank was cut, and routered to fit into the coachroof beams. Had to remove the three forward beams, and make fine adjustments for a tight fit to the king plank, in the workshop. Then used the router combination bit to router the decorative edge on the lower edge of the king plank, between the beams. Knocking on 18:00pm by the time all beams fitted back in the boat. We had done enough for this weekend.
 |
 |
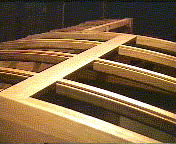 |
| Routering main cabin coachroof beams for seating in the King Plank | The King Plank in the vice. Routered out crossways to fit into the coachroof beams, and routered with a decorative finish along the edges between where the coachroof beams will be. | The king plank in place in the Main Cabin coachroof |
7/11/92
At home during this week the cutlass bearing was sketched out in detail for getting another one made up and also for the boats papers - should it be needed to repair work. The drawings where photocopied. Saturday morning we prepared a shopping list. Strand Glass was first port of call, and we had soon spent �60 on bits and pieces, using our 10% voucher from the Boat Show. They had no gloves this time though, i.e. Marigold ones, and no 50mm resin proof tape. Anyway made do with what we could get, and took off back to the Chandlery. Had a good look around and spotted a book. Yes another one - but this time it really did look a good one. �30 seemed to be justifiable for it. It is called "Boatowners Mechanical and Electrical Manual". Asked about the battery chargers (Newman-Aquaman), and tied the lad up in knots with questions. Problem no-one ever in these places who knows things inside out. Specialists you call them. We decided up one and bought it. However reading the leaflets that came with it, we read about a multi-voltage charger i.e. 110/240v to 12/24v at 15amp/8amp respectively. This was not mentioned in the chandlery, and we now would rather have the multi-voltage one. It is a bind setting out to buy something and not really knowing what one needs, and then no-one is around who is an expert to take the time to explain exactly what is available. Will have to make another visit to the chandlery sometime to see if they will swap it.
Back at the ranch, after quenching our thirst, we set to measuring up the shaft. Lance was getting ratty with his legs. Sitting in the bilges area of the hull, one could do with removable legs. It was not easy measuring up as one end of the shaft was outside of the boat. Needed to get in and out of the boat to assess adjustments , and position the propeller. Weighed it up though and marked the shaft, and marked the hull as to the position of the new engine beds.
8/11/92
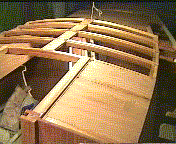
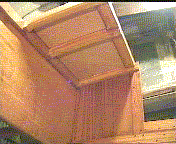
It has been quite mild this weekend. We started first on cutting and fitting the ply inserts either side of the companionway hatch. Grain was to follow same way as the side decks, i.e. alternate. The Sikaflex had to be warmed up with a hot water bottle, to make it easier to work with. Bedded down the four pieces of 8mm ply on Sikaflex, and secured with thin gripfast nails. Problem with hammer getting gunged up with Sikaflex and the nails bending upon meeting the Epoxy in the laminates, even though pilot hole drilled first. From the inside the plywood grain must match as close as possible. It was tremendously encouraging to view the companionway hatch area from inside. We are very glad we made the hatch area as large as it is. Hopefully plenty of sunlight will be able to get in. Next we epoxied into place the rest of the forward main cabin beams and with Sikaflex around the edges, epoxied in the main coachroof king plank, and then screwed it to the beams with 10mm stainless steel screws. We just managed the three beams, and the king plank in the twenty minutes before the Epoxy went off.
 |
 |
|
| Starboard Coachroof ply inserts in place around companionway hatch. All beams and King Plank now fixed in place | Starboard Coachroof ply inserts as seen from inside main cabin |
9/11/92
We rang the Chandlery about the Multi-voltage Battery charger, but it was their policy to have the original item returned before a further item ordered. It could be two weeks now before we get it. Rang up to request details on the spur cutters.
10/11/92
Had the fibreglass stern tube insert turned down to 60mm outside diameter at a workshops. The chap initially said it would cost up to �15, but when it was collected , they charged �5.
11/11/92
Details arrived regarding the spur cutter. Upon weighing it up and painstakingly drawing up more cross sections of the bearings and shaft assembly, it was verified that the cutter bracket would not fit. Our Bearing protrudes too far !. More problems, or Pa Problem !. We have now a good collection of drawings for the ships papers. These could be faxed anywhere in the world for replacements.
14/11/92
Switched on the workshop lights upon arrival last night, and flash, then darkness, Oh no we thought. The fuse has blown. It was 22:30pm at night, the fuse box is in the bottom shed, where there is no lighting, and we have no torch with us !. But then the fluorescent light proceeded to flicker. It was a blown bulb. Cold weather plays havoc with the bulbs. Calls for the thermally insulated ones.
Saturday morning arranged to be at Power Propellers by 9:45am, to go over our requirements. We left the shaft to be machined properly at both ends, plus to supply a cutlass phenolic bearing, and turn out the bearing fitting to accommodate a 40mm bearing. Vetus advertise them at inch and half, but 40mm is a fraction larger. Abroad one is likely only to obtain metric. Also they were going to see if they were able to weld on an extra piece to the bearing flange, instead of having to make up a new one. Saves expense, and is possible as the bearing fitting has never seen water.
That sorted out we then visited the Chandlery, to exchange the battery charger. Appeared to be no problem. The exchange one should arrive approximately Thursday. They will give us a ring.
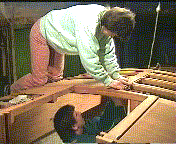
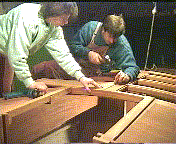
Back at the base by 11:30am. Quenched out thirst, and set to preparing the coachroof for the ply inserts. The king plank needed routering, and all corner joints of the beam needed cleaning of epoxy/sikaflex. Easier done now than when ply inserts in place. Had to put the fire on in the boat. It was more the dampness than the cold, that was giving us a problem. By evening we had cut four ply inserts, and fixed down two. Running short on the larger gripfast , but we have some slightly smaller that would suffice. Portside two ply inserts now fixed in.
 |
 |
|
| Shaping the coachroof ply inserts. One holds the ply in place whilst the other marks cutting line | Fixing in place the coachroof deck ply inserts |
15/11/92
Set to cleaning up the inner edges of the main coachroof beams, clearing Epoxy and Sikaflex, and roughly tidying them up. We now need some rough sandpaper to start a proper sanding down. There is plenty of sanding to get on with. It will take time, but it cannot be rushed, Fixed in the two starboard side ply inserts on the coach roof. Had to put the fire on in the boat again. With the coachroof nearing completion it does actually keep warmer. Must now get the starboard side deck done.
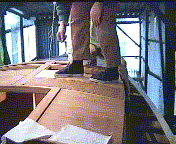
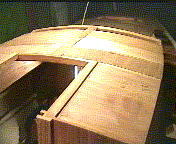
Then we cut and fitted the next two ply inserts on the coachroof. Cannot do the foremost two just yet , as the cabin front needs fairing. It really is transforming into a boat. Finished off by about 18:00pm and tidied up. Whilst we had the Sikaflex out, we cut the port edge deck ply where the shed roof leaks, so that Sikaflex could be squeezed between ply and fibreglass lipping. The leak drips onto the fibreglass fortunately, but some had spread to the ply, and was seeping underneath. Need to do this all along the deck edges between ply and fibreglass lip.
 |
 |
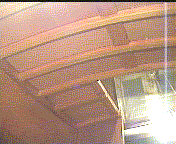 |
| Fixing in place more coachroof ply inserts | almost there. Last two cannot be done until the finished fairing the Cabin Front | Looking good from inside Main cabin |
16/11/92
The new spacer we had had made up for the exhaust on the engine, was fitted. Had made up some studs to fix it on with, but not sure if they'll need something better yet. The sharp edges were taken off the new engine brackets, and grounded i.e. rounded them.
21/11/92
Got up at 8:30am. Nearly thought we'd be stuck last night with the van. The field was absolutely water-logged. We'd forgot t-bags and sugar so no cups of tea yet. Took off straight to the Chandlery to collect the replacement battery charger. It had arrived yesterday. All seemed OK and we squared up. Next sped around to Power Propellers. A little too early, so studied the battery charger. Not too pleased 1) no manual - only a photostat sheet, 2) the sides are riveted on and 3) the battery connections protrude and 4) does the 12v/15v switch have to be so conspicuous. Maybe this one is not as good as the RM15F 220v version.
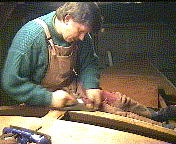
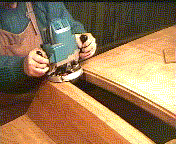
The propeller and shaft had been cut and fitted to length. Broke the bank with the �162 charge for modifying the tail end flange and supply 25mm cutlass bearing, plus the 2 castle nuts and 2 key pins. Back at base though we were not happy with couple of points. 1) They'd not cut back the tapered coupling to 60mm, therefore they had cut it back inside which means we need to have a long box spanner to get the nut off. 2) the nut is a plastic/steel self tapper, 3) what has happened to the rest of the 30cm shaft we had paid for 4) no spare washers we had asked for. Anyway now to get some gripfast at the Chandlery. They had no brown Sikaflex. Picked up some t-bags and sugar. Tried another Chandlery for brown Sikaflex. They had no Sikaflex at all, and the young lads reckoned Pureflex or something was just as good. About 11:45am now. Sped off to Strand Glass to get some brown Sikaflex, before they shut at 12:30noon. Had a look around other places whilst we were out then headed back to base. Now 14:15pm. 5 hours have gone already.! Downed many more cups of tea, put the fire in the boat, and set to sanding down the coach roof. Then it was routered and planed for the last two pieces of ply inserts. By evening had fixed these two ply inserts with Sikaflex and gripfast.
 |
 |
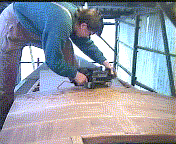 |
| Fairing the Main Cabin Front to the camber | Routering Main Cabin Front ready for coachroof ply insert | Sanding down Main Cabin coachroof after sikaflex cured |
22/11/92
Set about belt-sanding the coach roof where the last two ply inserts had been fixed. Sanded down the main cabin sides where ply meets it and where coachroof beams protruded. All belt sanding was completed and we set to removing carefully the surplus Sikaflex on the coachroof underside. A lot of sanding to be done.
23/11/92
Last night measured up the shaft assembly and because Power Propellers had not cut the Coupling back - making the shaft 20mm shorter than we specified - upon reversing it, the area worn by the bearing and gland packing clash, therefore as we had worked out the 20mm specified on the paperwork would have meant the worn areas of the shaft being clear, when the shaft reversed. Why can't people do , not what they want, or what is easier for them, but what we ask for ?. Anyway we were not to happy at all with the finishes of the work done. We ended up having to finish off every piece except the propeller.!. Then it was discovered that the keyways on the shaft had been cut off centre. . one side of the keyway higher than the other. Also the thread is whitworth 14G.
28/11/92
It was mild when we arrived Friday evening, drove the van straight up the field, but only just made it- swishing all the way. Set up the bed with single duvet cover in the middle surrounded by 2 sleeping bags, 2 double bed duvets, four blankets doubled, and then a hot water bottle. It was cold Friday night. +5degrees on the boat Saturday morning. Got the fire going and managed to get a stable temperature of +10degrees during the day.
Now we were back to doing some of the smaller niggly jobs before the forward cabin can be decked. First was to clench a knee for starboard, forward in the heads. We had made it up already when we had done the portside knee. Most awkward because the knee is narrow and with the shape of the hull had to hold the dolly and punch on the nail head. With gloves on of course. Have you ever held a lump of metal in cold weather. It is like an ice cube. Need to find inner strengths when doing jobs like this. It helps now because beams and bulkheads give added support. Put in four clinches, as per port side, and then affixed brass strip round it, after clamping with clamps and wood and wedges to bend it. It is not like a thin copper strip. This strip just remains now to be fixed under deck portside. We would have preferred now to replace the coach roof beams with new ones, but too late they are in. Bound to be a few things we are not 100% with in such a large scale project of a nature that have not done before. Set to removing Sikaflex carefully with a chisel and pallet knife from the undersides of the deck ply. It is a niggly job which wears the ends of fingers trying to grip the Sikaflex to pull it carefully. Any Sikaflex trapped behind Epoxy never went off. What a gungy mess. By evening all the starboard side clear of Sikaflex, Lights are a problem, especially when removing Sikaflex - we have cables and extensions all over the shop - lights hanging down and held in the right direction by string. By 17:00pm very hungry so went for a chinese. Everyone had the same idea and it was a 30 minute wait. The siliva was working overtime in anticipation the next dinner ready was ours. Evening it started raining, and it rained and rained and rained. Nothing unusual of late I suppose, but it adds to the dampness. Both of us had cold, damp feet. We would not recommend building a boat like this to anyone unless they have their own land, a heated workshop, and they are at it 5 days a week at least.
29/11/92
So cold , damp and miserable neither of us felt up to much. Continued cleaning up the sikaflex on the underside of the coachroof. Weighed up the fiddly jobs that are now in line before the forward cabin can be decked. Sorted out some Mahogany to make up two more knees from. They needed epoxying together. The Epoxy resin was cold, but just managed to mix a consistency. Whether it will go off we will see next week. In future need to put the Epoxy and Sikaflex on hot water bottle to warm it up. By 16:30pm decided to pack up and despite roadwork's, arrived home by 21:00pm.
- - - - - - This is the end of Diary Section 10 - - - - - -
![]()

