| Home | |
| Adventures | |
| Specification | |
| Diary | |
| Photo Album | |
| Contact Us | |
| Feedback | |
| Hints & Tips | |
| Polish Words | |
| Web links | |
| Problem | |
| Polish Yachts | |


Starting on Stainless Steel Tabernacle. Making up Companionway Hatch. June 1995 to July 1995.
28/5/95
It is nice and cozy sitting aboard the boat, out of the wind. Lots of talk and discussion today over what needs to be done and how we will do it etc. By evening we had epoxied in place the inner frame of the cockpit sole, not without one of us getting our trousers covered in epoxy. The hatch gap is such that standing in it one cannot avoid touching at least two other sides, whilst working on one side. Does not seem much for a days work, but small jobs take time. Need to look into getting some teak hand banister type moulding to fix on the lower edge of the inside main cabin sides. This will serve as a water drip collection area and also as a grab point. Later we also had an idea of using the same railing but upside down to fix to the top edge of cockpit well sides, to enable water to drip off rather then run over, and then be useful as a further grab point whilst seated in the cockpit. Had a look as well at the condition of the covering boards. We sanded two areas one amidships and one aft, and we could be lucky as it is only the surface that is bleached. Need to do something fast though, and get some bondex type /stainer on such that we can still glue to it later. Also the outer edges underneath the covering board need raking out and epoxy squeezing in via a syringe say to seal the gap between the hull and covering board. We had noticed on the hull stern a considerable patch of flaking paint/gelcoat. Got the ladders out, scraped at it , and then gave it a quick orbital sand. It looks like an area that has been filled over where the hull sections are joined. Needs attention later.
29/5/95
The forward brass hatch oxidization was cleaned somewhat, still needs further work. Weather was threatening rain, typical for a Bank Holiday, but it blew over and we were able to open the forward hatch. Made up a sanding pad with a length of mahogany and a piece of plywood about 3’ long in all. Then fastened a long length of Sand Paper around the length of it. This was used to fair off the Iroko lengths of the companionway hatch runners. They still need further sanding to complete, but they really need gluing down first. Completed painting the cradle with white primer/undercoat. It is now about 17:00pm and neither of us really wants to go home. We have really enjoyed ourselves this weekend.
3/6/95 & 4/6/95
Rain stopped play all weekend. Made a start on reconditioning the top section of the access steps to the boat. This was completed at home. The metal steps frame was rubbed down with a wire brush and painted up with hammerite. The wooden step was replaced, and the wooden back frame was replaced. The wood was painted with metallic pink primer. We need decent sturdy steps whilst the boat is undergoing construction.
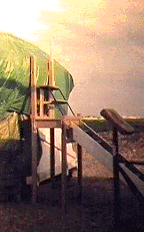 |
Our sturdy access steps to the boat recently renovated. |
10/6/95
Dull, overcast, windy and cold all weekend. Made start on finishing off the top steps section and fixing them onto the lower steps section, then giving it all a coating of pink metallic pink primer, on the remaining bare wood. Our Parents arrived as expected. They had found the marina ok, being on holiday in the area. They had come wrapped up and with soft shoes as advised. They were eager to see on board, this was the first time they had seen it for real, but we kept them in suspense whilst we just finished the steps. Dad, a Baptist Minister, once on board, blessed the boat with a bang on the main bulkhead!. Showed them around the marina, they stayed about 3 hours, and seemed to have enjoyed being shown on board. They have got a better idea now of what we have been working on and all the work we have yet to do. After they left it was a while before we could focus on what job to start work on. Discussed this, and that, and the other that needed doing, and then decided to fix with epoxy and screw into place the main companionway hatch runners Just enough epoxy resin & hardener left.
11/6/95
Again weather doubtful, and it was some time before we decided ok to uncover the boat. Needed to mop up the after deck after heavy rain shower this morning. Discussed how possible to make up the combing for the spray hood, and also for a box section, into which the main companionway hatch slides under. We had seen this construction on quite a few yachts, but not yet sure it was appropriate for us. Started sanding down the inner edge of portside companionway hatch runner aft. Used sandpaper and cabinet scrapers. Once one side flush, then need to use the router and a long piece of wood to router the starboard side equal distance all along, otherwise the hatch will not run smoothly.
12/6/95
Very cold and miserable start to the day so contemplated doing some shopping today. We needed more epoxy and screws, and also to obtain some naval brass bar lengths and stainless steel extrusions for the main companionway hatch and runners. We had decided we did not want wood to wood for the hatch sliding mechanism. Headed out and replenished Epoxy stock and stainless steel screws stock. Whilst out found an interesting place not to far away which stocked stainless steel tubes, of all sizes, and we were quite welcome to search through the off-cuts at any time. Found a place for sheet/bar metal, but we were kept waiting outside the front door. They had a door entry tannoy system. They soon said they could not help and they did not go out of their way to portray what they did actually sell there, and just suggested another place. Unless you are big orders with big money some companies are not interested. Found this other place but they could not help us either. Naval Brass bar could be got hold of , but not extrusions. They thought we would need to get someone to machine up a thicker bar of Naval Brass etc. A hundred miles and six hours later arrived back at the boat armed with Fish and Chips. Funny how one feels even hungrier when one knows there is food coming up. After eats, sorted through the screws purchased today and the assortment of shackles etc. Excellent assortment for Ł100, including the mast-step bolts. The biggest stumper at the moment is the metal for the main companionway hatch.
Two weekends missed here. Van mot was due, needed to clean it up and give it an annual service etc. The van has been an excellent work-horse for us, being our transport, accommodation and storage space whilst working on the boat. Ended up emptying the van completely, a hoover out was well overdue. Then all the tools where gone through. We were still carrying some unnecessary items from when we moved the boat, last year. The second weekend we spent completing, or at least getting well underway was the shed at home. Gave this a good clear out and sort out. The intention was to build a workbench in the shed and to possibly put shelves in the loft to display better the enormous assortment of screws and fittings we are accumulating. During the week extensive measurements , plans drawn and timber list made up for the companionway hatch.
1/7/95
Start of Indian Summer now. At least we have a breeze down on the boat. The job top of the list today is the mast step timber. This was not yet fixed in place, and we needed to make up a tabernacle out of stainless steel. Placed the tabernacle base pattern on the mast step timber and it did seem out by a mil or two at one end forward. The new bolts were tried and the holes needed redrilling and opening just a touch. Need to allow a mil or so for the timber swelling out etc. Poser problem then to resolve. Was the centre line correct and what fastenings should we use on the forward edge of this timber as there is no beam underneath. Decided to use the eyebolts we had used to retain the tiller during the move. But then two eyebolts would be too much and decided to use just one eyebolt. How could we check the centre line of the boat. Thought of using a length of timber the width of the boat, just behind the forward hatch, then with smaller pieces of timber and the level try and get the centre line of the boat. In the end though put piece of string on the bow point forward and held it back to the main cabin. What did look peculiar was the forward king plank area was offset by 1", or was it the forward cabin that was out ?. Used a steel rule and measured halfway across port/starboard join of the ply on the forward deck. Turned out to be the forward king plank originally fitted before we took the project over, was offset. Our measurements are correct, as we knew they would be of course. Thought of needing some wax on the bolts to prevent them sticking in place. Removed with scraper and acetone the ‘backing adhesive’ off the deck, which had remained when we pulled the duck tape off – which had been keeping the rain out of the holes. We then sanded down the epoxy on the deck ply, onto which we would be bonding the mast step timber. The mast step timber was degreased with acetone. Epoxy was painted (no filling) onto the deck, and then the underside of the timber. We needed some wax for the bolts so got some pledge spray. Sat on some old timber lying around in the boatyard, the bolts were dolloped with wax spray. Then quickly wiped down to remove the excess. Epoxy was going off fast, and just finished the bolts and nuts etc and started mixing the epoxy filler mix for sandwiching the timber to the deck. Have we mixed enough ?. Painted this mix on the timber, turned it over and lowered it into place. Had to keep it from sliding whilst put in the bolts. Lance then held the bolt heads atop, whilst Ruth tightened the nuts on board. Had to wipe away the residue epoxy drips etc and Ruth still got a tough on her hair, not to mention the patch Lance stood in as well on the cabin sole. Tightening the bolts in alternate rotation took time. 10 bolts altogether and 1 eyebolt. By the time they were done, the epoxy was already going off fast. Just caught it in time, with the acetone to wipe away drips and clear away the excess. There was enough resin/filler mix. Another job we are both pleased with, and it all went well.
 |
 |
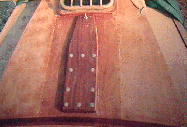 |
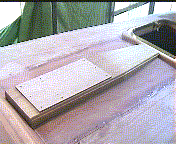
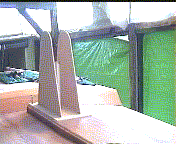
| Mast Step timber on deck with the tabernacle base pattern in position. | Tabernacle patterns giving an idea of what the finished tabernacle would look like. | Mast Step timber epoxied into place, and bolted until the epoxy cured completely. |
9/7/95
Thunderstorms and pouring rain, but all had cleared up by 11:00am, and although overcast, it was sunny and very close and humid. Put the white curtain up around the van windscreen to try keep the temperature down in the van during the hot midday sun. It does keep the van somewhat cooler. Set up the marine battery charger we had bought so that we can use the fridge and van fan and keep the van batteries topped up. We are short of nothing in the van. The 12v fan has been a boon in the van. During the night/early morning we can reach out with our foot and switch it on/off at leisure. Decided now we had to find out from where and for how much we could get the tabernacle pattern pieces made up in stainless steel. Took over the tabernacle patterns to a local Stainless Steel workshops in the boatyard. They had no guillotine or mill and they buy in cut sheets. It was cheaper for them that way. The chap was going that way this afternoon and could take our patterns with him, and see how much it would be. Left it at that. We decided 8mm stainless steel would be what we needed to make a substantial tabernacle. We had seen so many feeble and flimsy looking tabernacles on board yachts whilst we had traveled around. It is our intention to build this Yacht as an ocean going, round the world Yacht. Back on board decided to check and replace all sheet eyelets where necessary. Needed some more spinnaker repair tape. No problems because they sell it in the chandlery. Popped over and paid the rent. Heard later from a neighboring Yachtsman , maybe true, maybe not, that a new Top manager has started in the boatyard, who has no interest in boats at all, only money, and already he has been going over the site to see where he can make his mark. This is how the 'No Fishing' sign had suddenly appeared, no doubt. Next we will come down and there will be a ‘No Boats’ sign!. Started thinking of the main companionway hatch again and how could we make a start on the combing (for the spray hood), which is all to be made in combination with the hatch and hatch box. We found a length of 9mm ply, just the right length at 68" and 8" wide. Ideal to make pattern for the spray hood combing. Next how to bend and shape it and keep it like that. Need 2"x1" or similar. Found length of mahogany 66 ˝", ideal length and screwed onto the end of it short lengths of 2"x1". By bending the ply decided that 1 ˝" would be enough to give a decent curve. The mahogany then sits on the companionway hatch runner beams, and the ply at the moment sits on top as well. Used a compass to scribe the ply to the deck, and sit over the hatch runner beams. This was cut with jigsaw @ 45degree angle etc. Two fittings needed to get a good fit. Then using the pattern of the hatch-end section, which we had been able to make up during the week, cut the ply so that the hatch will in effect slide underneath the combing. Looking good so far. Used the hatch pattern to draw the top edge curvature on the ply and this was cut.
 |
 |
|
| Making up a pattern for Spray Hood combing. | ||
11/7/95
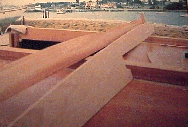
Visited the Stainless Steel workshop in the boatyard and we were asked if we were sitting comfortably. The damage for the tabernacle pieces of stainless steel cut to shape would be Ł223 . Criky!. Stainless Steel has gone up in price. Prices have rocketed recently because of the shortage of nickel. We had read something in the Boat magazine about such. We needed the tabernacle pieces and could not cut down the 8mm to less, so we decided to go for it and count the cost. Weather up and down today. One minute it is extremely hot, next cold blowing wind. Contractors working on a Yacht near us today. Ignorance had them and they tried all the electric meter sockets including pulling ours out!. No manners. We had battery charger and fridge running and for a moment we thought we had blown a fuse. Shouted at them to plug us back in. They disappeared and plugged in elsewhere much to our relief. Visited an electronics shop in the boatyard to get better idea of sizes of navigation panels etc. They gave us a catalogue. Then did further work on the combing ply pattern. Altered the angle of it. Just when we could have done with other spray hoods to look at, and there is not one in sight. Thinking of giving the combing height in the centre for a navigation console. More thought needed here. Building a boat you not only have to think about the job you are tackling now, but you also need to have considered all the other jobs further down the line and be sure that all dependencies have been accounted for. Next we dug out a ľ" x ľ" length of mahogany and clamped it onto the starboard outer side of the cockpit to see if we could alter the straight upper edge and curve it somewhat. Clamped the mahogany in several different places, each time standing off at a distance to eye up the finished line. Finally settled for a gentle curve. We could always plane more off afterwards. As the jigsaw would be awkward cutting on the outer side of the cockpit side, used the router flute bit, with the wheel up against the clamped on mahogany. This had to be done in stages as the mahogany grain was in all directions. It took time, plus needed goggles as using the router horizontally. Fortunately not too much wind today and sawdust kept within our area. Once done it does now have a slight curve and is at a stage to be worked on. Contractors faffing about again with electrics in our meter pod and in the end their lead must have been dodgy as they then blew the switch, and the security chap had to be located to switch us back on again. Nuisance, and potentially dangerous if you are using a power tool at the time. The security chap made routine visit yesterday, checking who was plugged into electric etc and had to ask our boat name again. We have now chalked it on the crosspiece of the aft shores. Will need to make up some name plate.
 |
ľ" x ľ" length of mahogany clamped in place and routering the upper edge of the cockpit side to its new curvature. |
 |
12/7/95
Made a ply pattern of the cockpit side starboard we had just routered yesterday, and routered the portside likewise. We were thinking then about the timber needed to batten this upper edge of the cockpit sides. The bit we used for clamping was a short section of the remaining timber set aside for the toe-rails. Decided to retrieve the long lengths of this timber set aside for the toe-rails from out of the timber stack. What long lengths they were too, about 17'. Two of them. It is a shame to cut up such long lengths, we will not get any so long again. Lifted one onto deck to see what it would look like as a toe-rail. Problem was it needed both of us to hold it, and then neither of us could get off the boat to have a look at it. Got the steps out and fixed the forward end of the length on to the bow with masking tape , whilst one of us bent and held the other end, the other person was able to take a look. Should we start with the length forward or aft. Neither of us could decide forward or aft. What an enormous decision to make. We pondered over it for what seemed like hours. By now it was 18:00pm and we were bubbling with enthusiasm to work – strangely enough. Thinking about starting forward with the timber, but then maybe aft. Oh no. How and when can we make our mind up. Will need some bolts anyway to pass right thru the toe-rail and the deck as it needs to be very strong. Decided to leave this for now.
14/7/95
Much thought decided us to maybe make do with the iroko for making the companionway hatch and used the money saved to buy a pillar-drill. This drill would enable us to do all sorts of jobs, especially for the boat. Popped out to local tool shop and came back with a 16 speed Pillar Drill plus mortise attachment and three new mortise chisels. This morning , and as it turned out all day, was cold, sunny and very windy, with threatening rain showers. Checked again at the Stainless Steel workshop in the boatyard. The tabernacle sheets had been cut ready , and they would be picked up this afternoon , we could collect in the morning. Set up the pillar drill and tried all the speeds and tried the mortiser etc. It all works very well. Brass was drilled ok on a slower speed. Then set up, having lifted the drill out of the van, making some wood dowel plugs. So much easier to do and much less wood wasted with the pillar drill. It was 20:30pm when we packed up , washed, changed and into the bar by 21:00pm, just in time for eats.
15/7/95
Awoke 7:00am eager to collect our stainless steel tabernacle pieces. We could not wait. Popped out about 5 past 9, spotted the pieces, or at least 3 of the four, but no patterns. Found the chap in his office. The patterns were on the bench, but we were a tabernacle piece short !. Does anything go right !. Workshops are not open today (Sat) so the chap would get in touch on Monday. The chap remembered we needed 2 sides and the company had quoted us for two sides. Why he did not pick up 2 sides beats us !. Anyway the chap would sort it out and catch us next weekend. By gum, golly gosh. The 3 pieces we got were heavy. It is deceiving and the pieces did look big. That is in comparison with the other tabernacles we have seen, which are under specification we think. We did see a tabernacle like what we had originally designed, except the side pieces were triangular, and not rounded at the top. To us it really did not look quite finished. The other week we spotted two wooden spars in the yard, from a Yawl. The base of the mast was 4" x 4", ours is much the same, and the bolt hole was ľ" / 20mm. Much what we had planned. We anticipate getting our tabernacle done and fitted, then make up a softwood mast base – high enough though to proceed and make the boom etc.
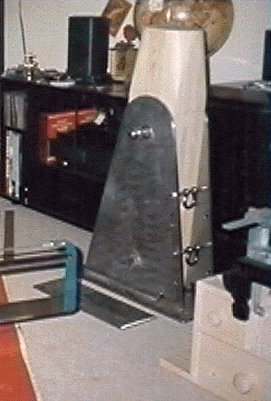 |
The Stainless Steel tabernacle after many, many, many
hours of hard work, and still lots of hard work to be done. More of this
later.
At this point in time we had just bought the stainless steel pieces. The edges of these needed filing, holes needed drilling and the surface sanding etc all in preparation for welding together etc. |
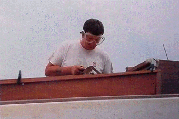
The tabernacle base was the first piece to work on. Noticed later that one of the long edges had actually been cut at the wrong chamfer. All the pieces will need the edges tidying up and a good sand down. Marked on the base plate where the bolt-holes were to be, then marked where centre is of each hole. Small automatic punch would not imprint centre point, it slipped easy. As we had nothing else, dismantled temporary the punch and used the hammer point out of it and a hammer to knock the centre hole in. Started with 7/64 " drill bit, and drilled the 10 holes on the slowest speed. The secret lay in taking it steady. The 7/64 " drill bit was just wider than the tip of the 10mm drill bit. The idea being it would give a good start for the 10mm drill bit. However ran into problems with the 10mm bit. It kept jamming and it took a chunk out of the drill end. It appeared too much for it in one go. Used a 11/64 " bit , then retried the 10mm bit. Same problem. So then tried 9.3mm, This struggled as well, and also took chunks out of the drill bit. Used the 8.8mm bit, and ended up with a small chunk out of that as well, but persevered with it slowly. Frustrating now we had got so far, and just needed the holes opening up another 1mm. Really needed proper milling bits. Over Tea had thought of the tungsten carbide router bit and had a go with that. That worked quite well, even though we managed to chip that as well and we needed to be ready in case it jammed at all. It did the job though and about 4 hours or so later we had drilled out all ten holes in the tabernacle base. Both sides of the holes were countersunk. This is when we took to sanding down the pieces to get some sort of shiny finish. Started with wet and dry. This was slow and tedious. We had no energy for lots of stainless steel sanding etc. Then we tried the belt-sander, then a wire brush in the pillar drill and that soon shifted the surface of the stainless steel, to be followed by sanding to a final finish. Then the edges of the base were filed. Not a brilliant edge had been cut. Very uneven to say cut by professional machinery. Our file not too sharp either and it seemed to take for ever and a day to get anywhere filing down the edges. By 18:00pm though excellent progress made and the base is really taking shape. The pillar drill stood in the van doorway, made it just right height for working on. We did end up though with lots of Stainless Steel spirals on the floor. Tedious tidy up job as all the stainless steel seemed to be good at was jabbing your finger. Noticed later the tabernacle back plate is actually cut like it is twisted. The upper and lower surfaces are 125/126mm wide, but both long edges are chamfered the same way. This makes it very awkward for filing down.
16/7/95
Very breezy start to the day and several heavy showers, with more forecast for this pm. Beginning to think today was going to be a loss. However found plenty to talk about especially about vices needed for the pillar drill. Ever heard the saying "All I need is just one more tool!". Had to visit the chandlery for some Engineers files as ours are quite blunt now for stainless steel. Just got back from the chandlery before another brief heavy shower of rain. Had a look under the boat at what ply and iroko we had. How best we could cut up some lengths enough to make up the companionway hatch. Problem was the thickest pieces we have are 50mm. Ideally we needed 60mm+. How could we do it. The hatch frame would be thinner than planned with 50mm timber, but it was the only way we would get it out of the iroko we had. New timber for this would be couple of hundred pounds at least. In the end decided to mark up the hatch pattern to fit on the timber, but in effect loosing the 10mm extra height we would have liked. Cut up to length strips/planks of iroko, as per the cutting list we had made up the last week or so. It is mid afternoon now, sky s dotted with white clouds, letting the sun shine intermittently. We now needed to uncover the boat, at least the companionway hatch area, to double check some final measurements , and see exactly where the beams lay, and confirm the direction of the ply inserts in the main cabin. It was looking like a lot of timber was going into the companionway hatch. Had to cut into a sheet of Thames 8mm ply , which would be ideal for use as ply inserts in the hatch. We did uncover the boat, and amidst cool wind, checked and marked down the necessary measurements. Then all the timber, ply, pillar drill and all the usual gear had to be fitted into the van to take home to work on.
During the week worked extremely hard to plane down the forward, aft, port and starboard sides of the hatch frame. Ended up with couple of bags of sawdust shavings. Extremely useful having the pillar drill and mortiser attachment. Once set up it was straightforward to do the mortise joints on the forward and aft pieces of frame. We both had a go at planing. There was so much to come off in places. We decided to use the Iroko having just spent the money on a Pillar Drill. Contemplated long and hard over how deep to seat the ply. We had lost 10mm in height of hatch, because of the already finished sizes of the iroko we had planed up. MDF board was laid on the lounge floor to serve as an assembly base. By Friday evening there was just two more tenons to be done, so cracked on until dusk to complete these.
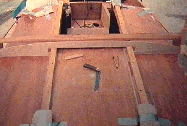
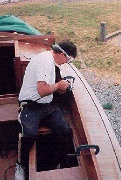
22/7/95
Down at the boat called to collect the 2nd Tabernacle side. It had been cut apparently just not given to the chap when he collected the other pieces last week. The invoice was not yet made out and the chap said he would do it this week, and catch us next Saturday. We left our name and address. Set up the work mate etc. Made cup of tea and slotted together the hatch frame and tried it on top of the runners. The measurements were perfect. Measured now where to position the two inner hatch frame beams. One will be level/aligned with the main cabin beam, the other will be midway between this beam and forward of the hatch. The ply will be seated into these beams, but the Iroko lats are to ride over the beams . Thought about having the Iroko lats about 4/5mm proud of the hatch surface, and then chamfered around the edges. Sounded like a good idea. Then only need to allow for 9mm ply seated in + 6mm Iroko (15mm). This 6mm for iroko needed to be taken off the upper edge first – accurately using the hatch pattern piece to mark it, then the tenons could be marked up evenly spaced between the timber that was left. This done then used the tenon saw to cut away and make the tenons. It all took time. Then we got out the pillar drill and after setting it up made the four mortise joints in the side pieces and the frame was completely assembled, and we tidied up ready for eats. It is all piecing together extremely well. Still a lot of work to do on it though.
 |
 |
 |
| Pillar Drill at work down at the boat, completing mortise joints on the inner hatch frame beams. | Companionway Hatch frame slotted together and placed into position. | Underside of the Companionway hatch, the ply inserts in place. Iroko lats cut ready to fix on the top side. |
- - - - - - This is the end of Diary Section 25 - - - - - -
![]()